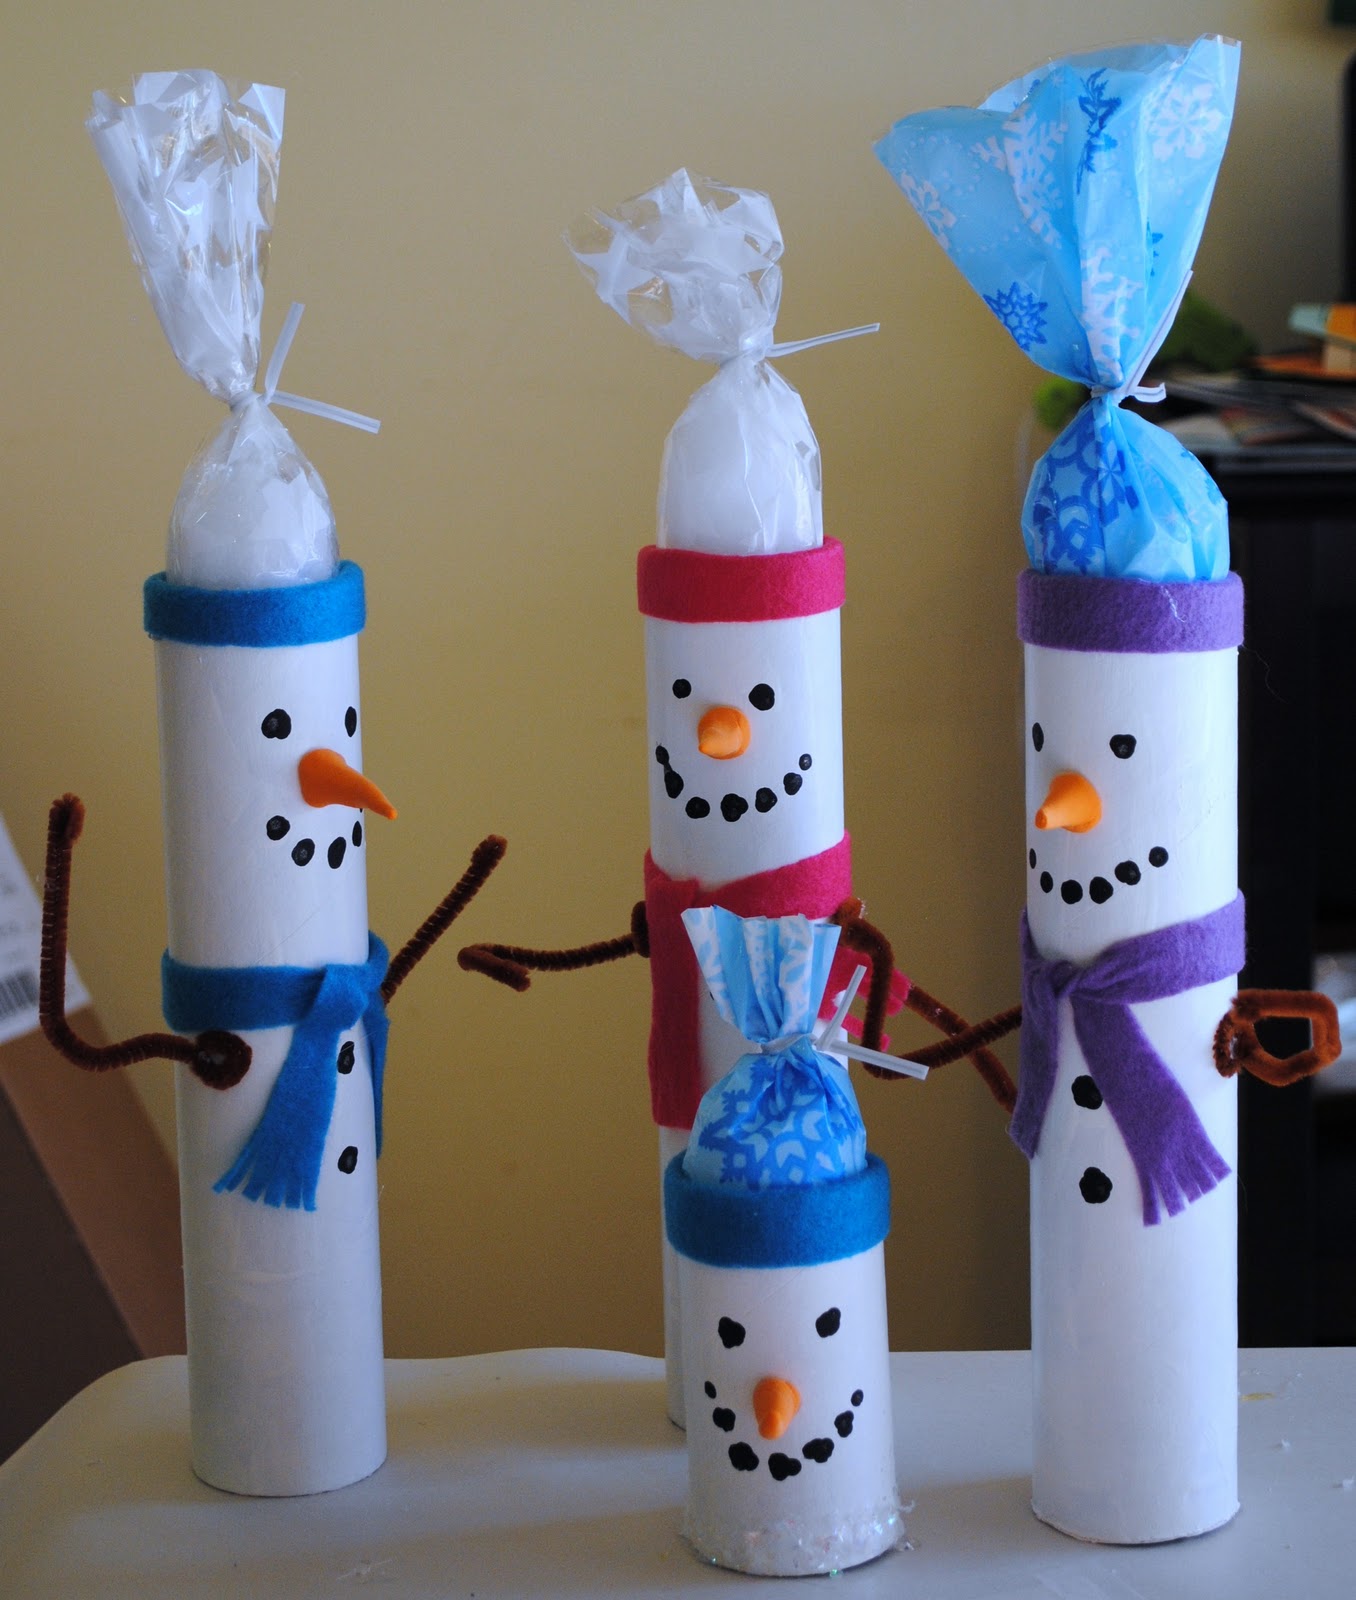
Monday, December 20, 2010

Personalize a Holiday Treat


Candy filled photo containers

It's not too late to give a personalized photo gift... make it yourself with a recycled container, ribbon and hot glue gun.  The hardest part is choosing which photos to use.

This year's batch of delicious chocolate bark (a Family Fun Magazine recipe) was gifted to friends in a recycled cardboard container.  What a great way to share photos from special events!

Festive Chocolate Bark Recipe 

Enjoy,
Tracey

Friday, December 10, 2010

Tuck-It Boards

Artist Henri Matisse has always been an inspiration.

The Green Line
Fauvism:  Color, pattern, bold portraits full of symbolism- what's not to love.


Beasts of the Sea
And more recently, I am inspired by his paper cuts like Beasts of the Sea.  Brilliant.


I make my own paper cuts into functional art called.... The Tuck-it Board.


The Tuck-it Board is like a French Memo board, except that the Tuck-it board is a hand- made, one-of-a-kind work of art by me!  

The Tuck-it Board: How it all began
I made the first Tuck-It Boards for my friend Jenny who was about to have a baby.  I designed her paper owls and birds to give as baby shower favors.  She needed a fun way to display them, so I made a ribbon "memory board" designed with cut paper trees.  Jenny clipped the owls and birds onto the ribbons, and her shower guests selected the one that they wanted.  Now Jenny has those two boards to hold all sorts of special memorabilia.


The Tuck-It Board: Jenny's Shower

As it goes, someone saw Jenny's boards and asked if I would make one for her.  Absolutely, and the orders keep coming.  I love to give them as baby gifts, birthdays, or for any occasion.  A gift card underneath the ribbon of a board makes a gift worth receiving. 


I love to create the boards; they are an artistic challenge of composition, color and pattern .  I make boards to keep up inventory, they are usually designed as a play on nature and childhood.  Most of the boards that I make are custom orders (and a lot of fun to make.)  Just request a size, color scheme and theme, and I'll do the rest. 

Interested?  Contact me for details and pricing at
Check out my current inventory on Facebook
http://www.facebook.com/album.php?aid=24094&id=1560647575&l=74609cac90


Monday, December 6, 2010

Hand Made Ornaments

This year family and friends will recieve an ornament to top off their gift.


Recycled Idea :)


Reindeer Candy Cane


Recycled Objects
Bottle Cap Snowman Ornament


Bottle Cap Snowmen Magnets and Pins


Reused Items: Fiber Filled glass bulbs that have been sitting in a craft drawer for years
Glass Snowmen ornaments

The Ornament Game
My sister-in-law Laura gets all the credit for this great idea and now it's a family tradition.

Here's how it works.

Each member of the family buys or makes an ornament.  Usually we choose ones that we know someone will want (that covented Hallmark Star Wars ornament that Jamison and Uncle Sean both want, or fish/tool ornament that all of the men in our family fight over).  Don't wrap the ornament, it needs to be seen as a teaser!

Gather all who are playing with thier ornaments in hand to a location that allows everyone to: sit in a circle, view the ornaments, and reach two dice that will be rolled.

The youngest player goes first, then take turns clock-wise.   Once everyone has had a turn, it's a round.   
On your turn, roll both dice.
Rolling a 7 or 11 let's you switch your ornament for the one of your choice (trade ornaments with the person holding it).
Sometimes we'll change it up, if you roll a 3, everyone passes their ornament to the left, etc.
Create your own rules.

We get quite competitive in our family, so be sure to set a round limit before you begin.  (Someone always wants to keep playing if they didn't get the ornament that they want :))  We usually play 3 rounds (everyone rolls 3 times) at the end of the three rounds, the ornament that you are holding is the one you keep. 

Enjoy,
Tracey


Friday, November 19, 2010

Snowmen Gift Totems


Snowmen Gift Totems

Looking for an inexpensive yet creative way to tell the baby/pet sitter, daycare/neighborhood friends, teachers, etc. that you are thinking of them at the holidays?  Make this cute snowman gift totem out of recycled tubes and misc. craft items.  A cello bag from a dollar store creates the hat and a great place to put your choice of candies or whatever you'd like. 

Grab your kids (my three year old helped me); there is something for everyone to do! 

Enjoy, Tracey


Step 1- Paint cardboard tubes


Steps 1 & 2
 I am fortunate to have access to thick cardboard tubes, my husband brings them home from work.  They are the centers to  plotter paper.  Paper towel and toilet paper rolls would probably work, but they will be smaller in diameter and not as sturdy.  Find a drafting company near by, I bet they'd save centers for you. (Recycle, recycle, recycle!)  I also had white wall paint left over.

Once tubes are painted, then cut them.  The tall snowmen are 10 inches and small one is 4 inches.  My husband cuts these tubes on his chop saw so they are nice and even.  A utility knife also works.

Step 2- Model Magic carrot noses
I purchased orange Model Magic.  I made 60 noses and only used half the bag.  Roll pieces of Model Magic so that one end gets thinner and pointer.  Stick them to paper to dry, this also flattens out an  end for attaching.  Think about real carrots, they are all different length, withs and have have bends etc.  The nose will give the snowman a lot of character!

Step 1 and 2 need a few hours to dry.  I did attach a few noses when they were still wet with my hot glue gun (I couldn't wait to see what they looked like!)  I would recommend that you let them dry overnight.


Steps 3 & 4
 Step 3- Glue Noses
I love my hot glue gun because it's an instant bond, if you are letting the kids help use a tacky glue like Aleene's Fast Grab Tacky Glue.

The nose should be placed somewhere just above the top third of the 10 inch tube or just above the center of the 4 inch tube.  I'd recommend you make a complete snowman first and then make adjustments.

Step 4- Scarf
I used felt for the scarves.  Ribbon would also work.  If you use felt, cut it along it's long side into about a 1 inch strip.  Tie it around the tube.  Fray the ends by cutting slits at the bottom. 


Step 5 & 6 (with an excited Logan)
Step 5- Add Coal
Coal can be added in many different ways.  I used black acrylic paint applied with a Q-tip.  You could also use buttons (if you have them, paint was more economic for me).

Step 6- Pipe Cleaner Arms
While coal is drying (if you used paint) make arms out of brown pipe cleaners.  You need one pipe cleaner per snowman.  Fold the pipe cleaner in half and cut with scissors.  Take the cut end and roll it into a small flat spiral.  This gives you surface area for attaching.  Bend over the other end of the pipe cleaner for a hand.
Attach the spiral end to the snowman just below the scarf on both sides.  Once the glue is dry, bend arms to create gesture.


Step 7
Step 7- Rim for Hat
Almost done!  Lastly, cut a 2-2.5 inch piece of felt along the short end of the felt (or ribbon).  (Half the the felt needs to be attached to the front of the tube and the other half needs to be attached to the inside of the tube.  You'll fold it over.)  Hot glue the top edge of tube, and then stick the felt on top with the ends toward the back. (You'll want the overlap to be in the back, not front).  Hot glue the inside of the tube and tuck and tack the extra felt to the inside.

Step 8- Fill a Cello Bag
Fill a cello bag (Dollar Store) with treat, but don't fill it too much, it needs to fit into the tube.  I slide the filled cello bag into the tube, pull it up so that some of the filled bag shows (this is the middle of the hat) and then put the twist tie on.  Think of the extra cello bag as the pom-pom of the hat, it may need to be trimmed.


4 Inch Head w. Snowflake Glitter Edge
This little guy has a snowflake glitter edge.  Just pour some glitter onto a paper plate.  Apply glue to the bottom half inch of tube and roll it into glitter.

Materials list (Michael's Craft Store and Dollar Store)
  • Tubes, painted white (free)
  • Model Magic-orange ($3.99)
  • Glue (hot glue or tacky)
  • Felt ($.29/color)
  • Brown Pipe Cleaners ($2.99/100 count)
  • Black Acrylic Paint ($.89)
  • Glitter (had it from another project)
  • Cello bags ($1/10 or 20 count)
  • Candy treat ?

Tuesday, November 16, 2010

All at once

My Logo


I have come to recognize that I do well when I have a lot on my plate... well, I must be doing quite well these days...

Monday my sister-in-law, Sarah, and her 2 year old son, Ajay will arrive.  They are staying until after Thanksgiving.  Thanksgiving will also bring my mother, father and grandmother-in-law as well as Sarah's husband.  But that's not all, my sister Heidi called and is now coming for Thanksgiving dinner with her family too.  That makes dinner for 14 in our little townhouse. 

Sickness will not be outdone by company; my three year old has pneumonia, and I have been non-stop coughing, aching and freezing.  Do I have the flu already?  Possibly.

That's not all... my husband just pulled the carpet off our stairs, we've been pulling staples and sanding steps since Monday.  FYI: 20 year old stair carpet has it's own ecosystem and cannot be used to make art!  His plan- to get them done before our company arrives.  Really?  I shall not stop progress, he is "getting it done."  I am listening to the sound of the sander as I type.  Are our boys really going to sleep through the noise?  What are our neighbors thinking?